This post may contain affiliate links. See my full disclosure HERE.
Jump to Recipepeanut butter and jelly milkshake
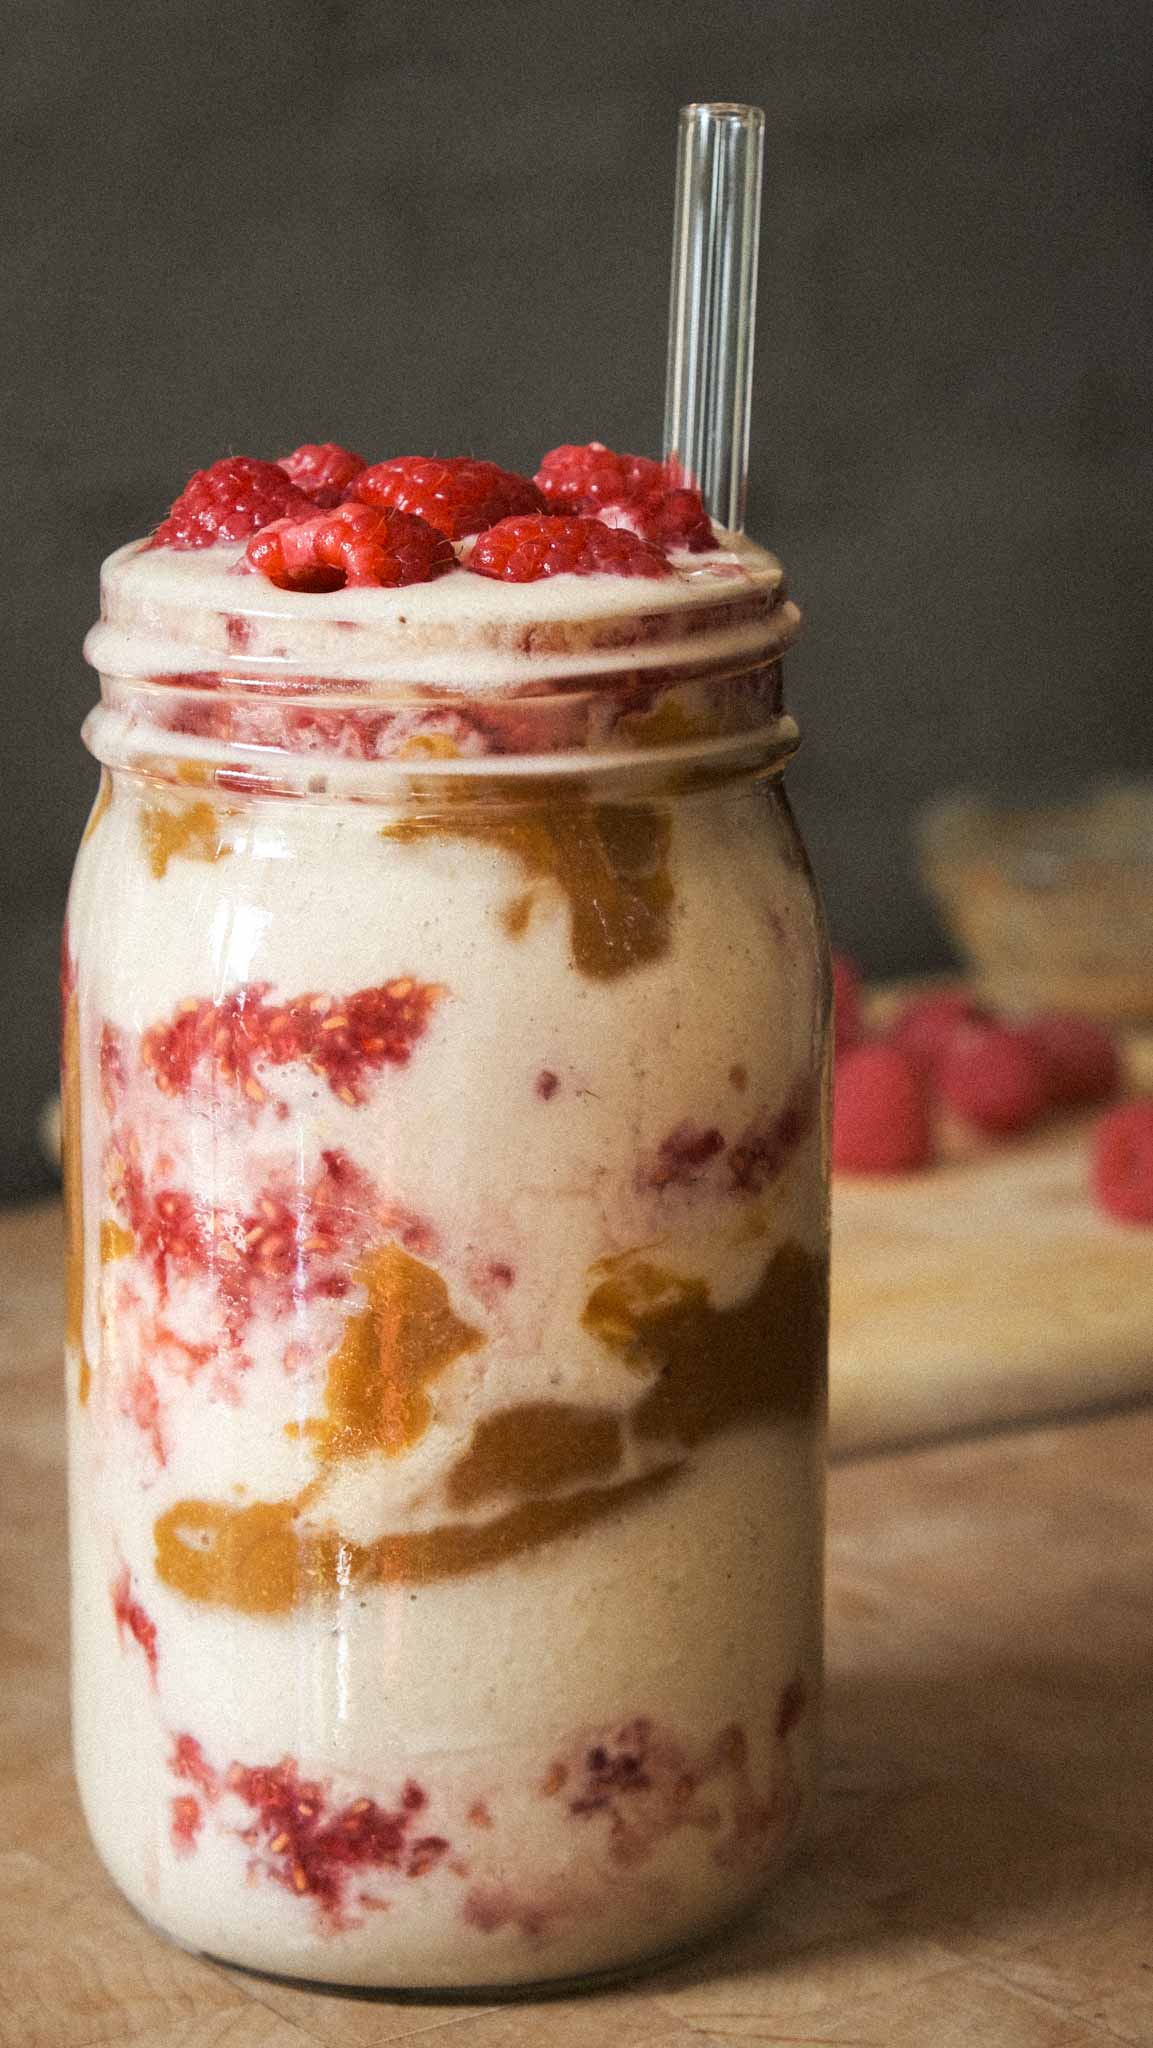
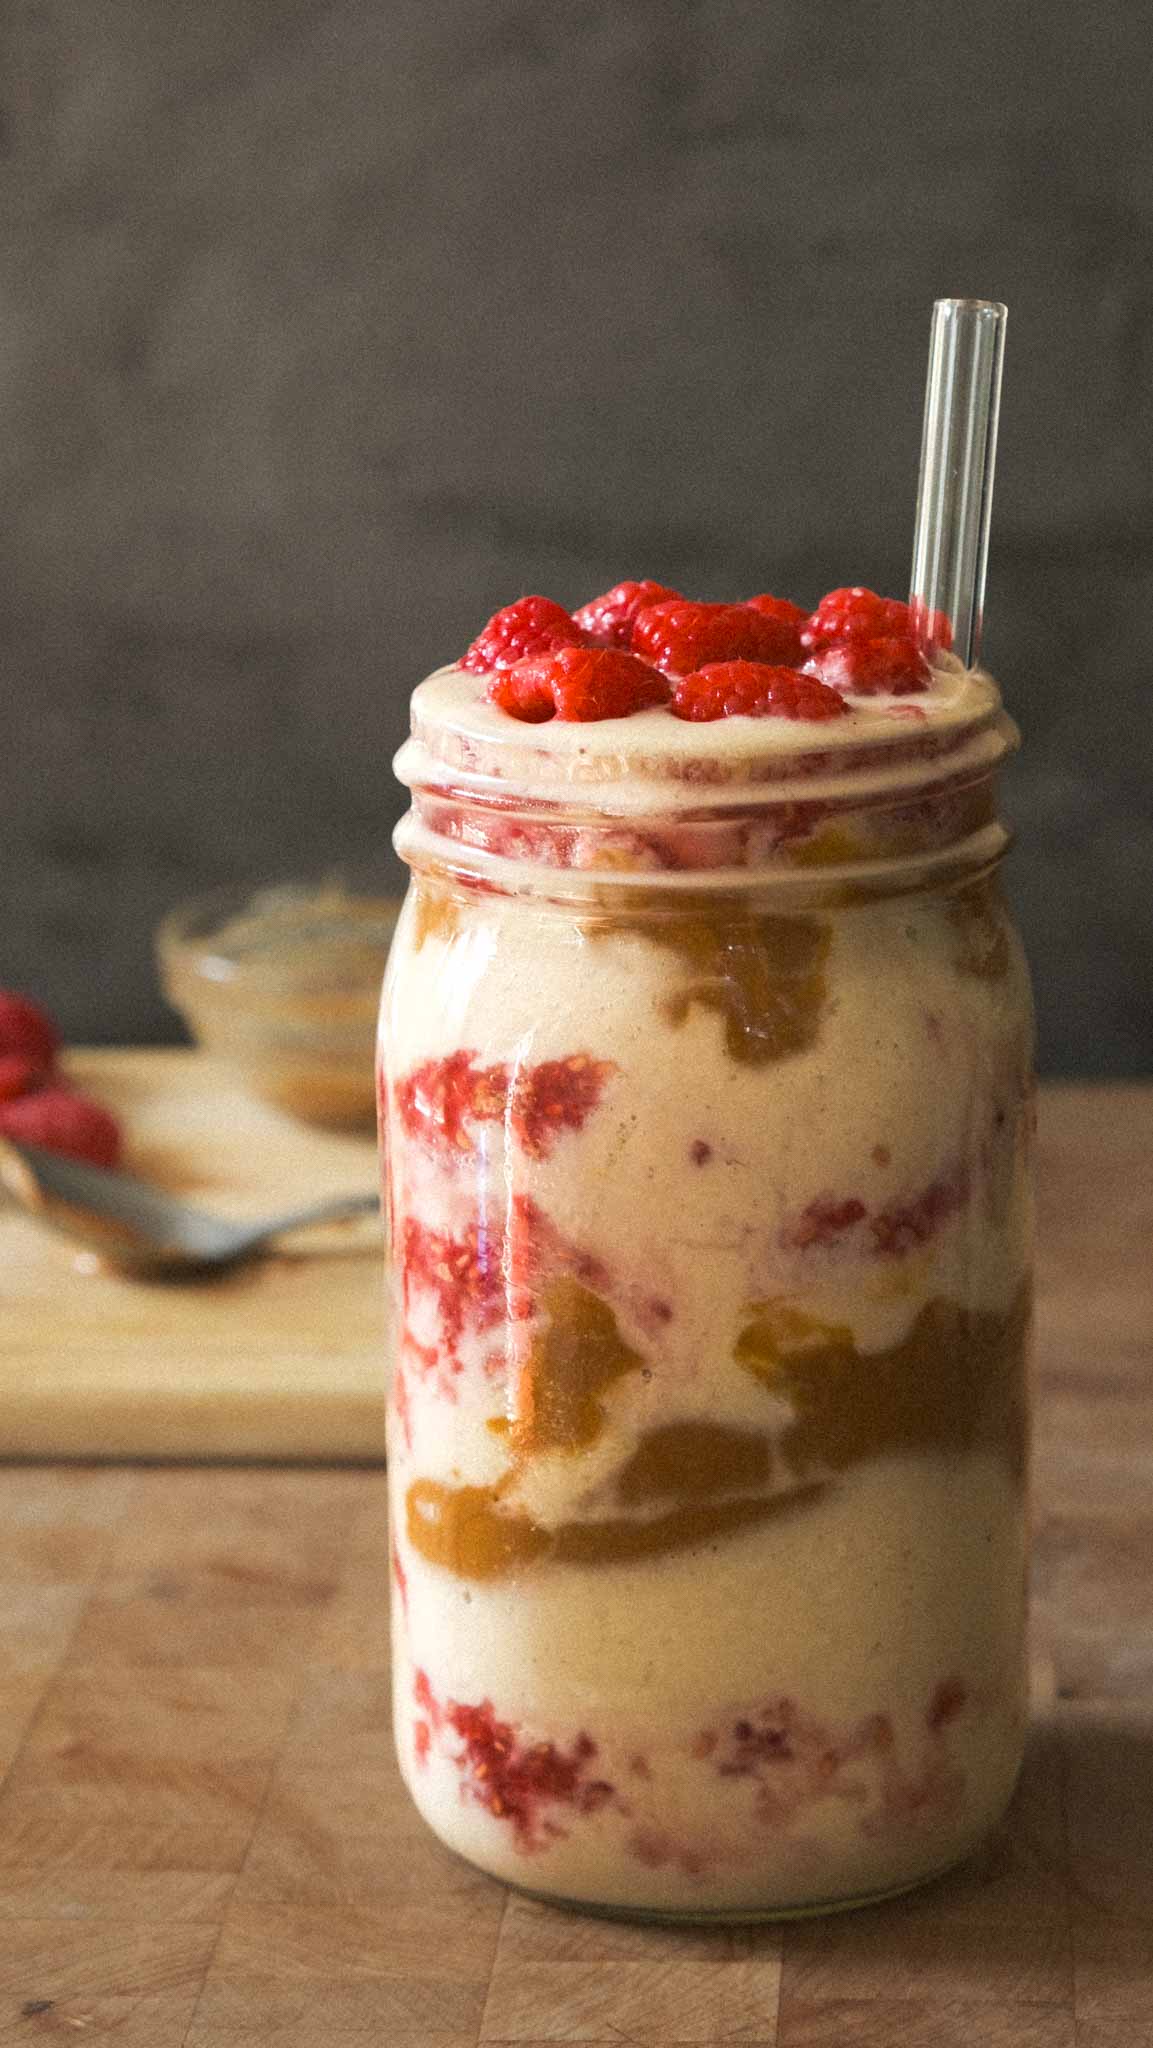
There is clearly good reason that peanut butter and jelly have been paired for eons, lets make it into an ice cold creamy milkshake! Check out the step-by-step instructions and video tutorial below to make this Peanut Butter and Jelly Dairy-Free Milkshake. It is creamy, subtly sweet, flavorful, packed with nutrition, vegan and gluten-free!
Recipe serving: 1 32 ounces
Ingredients:
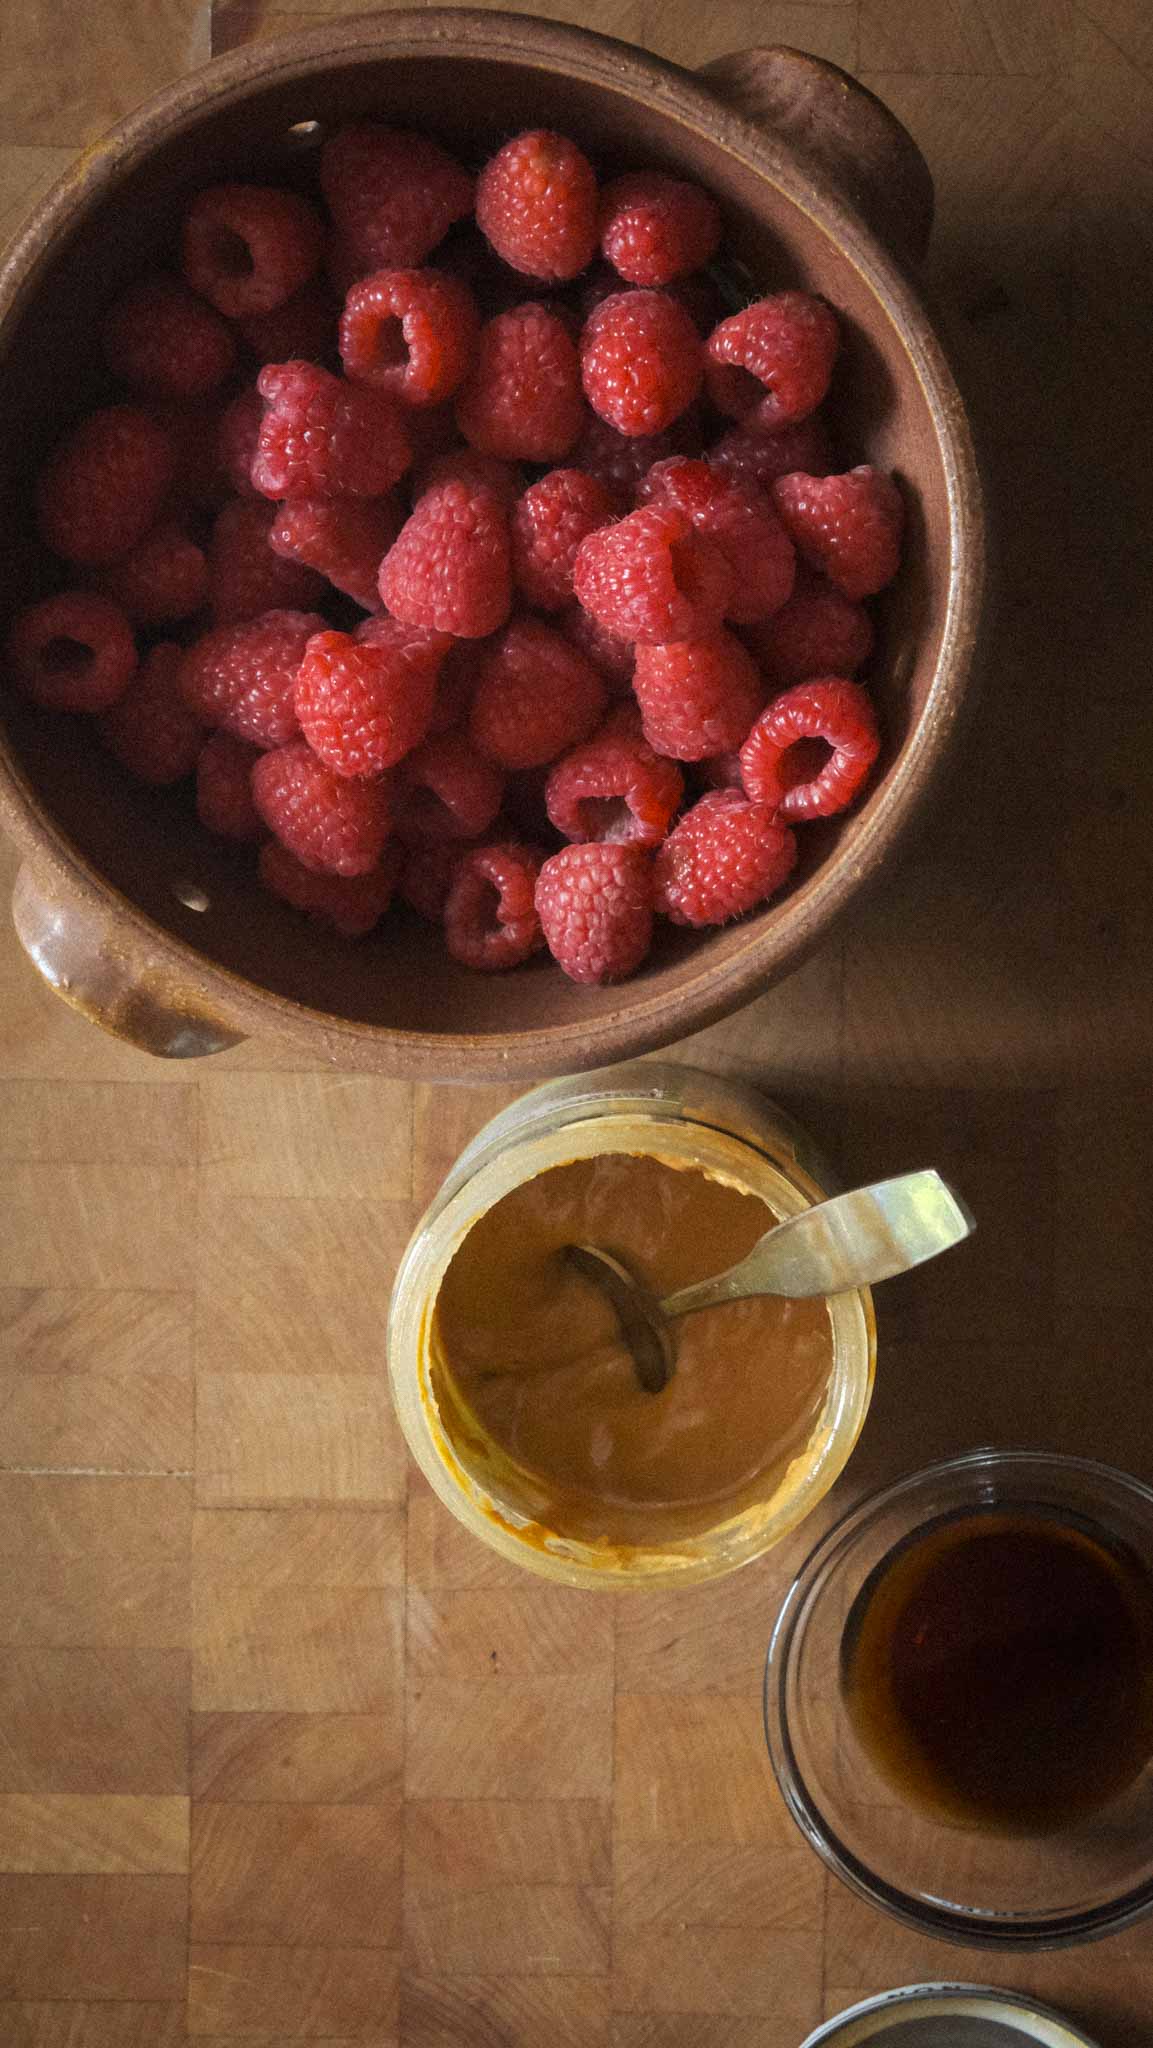
- 2 Frozen Bananas
- 1 1/2 cups cashew and coconut creamer-Nut Pod plant-based creamer or 3/4 cup soaked cashew and 2 cups of water
- 3 tablespoons creamy peanut butter
- 3 tablespoons maple syrup
- 1 cup raspberries
- Optional vanilla flavor
Directions:
*If using cashews and water rather than an already made milk, soak the cashews for at least two hours prior.
- In one ramekin mix the peanut butter and 2 tablespoons of maple syrup and stir continuously until fully incorporated. In a separate bowl, add the raspberries and maple syrup and crush the raspberries until the resemble a consistency that can be drinkable.
- Add the ingredients frozen bananas, milk, flavoring if using, to the high-speed blender and blend on highest setting for 50 seconds using tamper to move the bananas down into the blades.
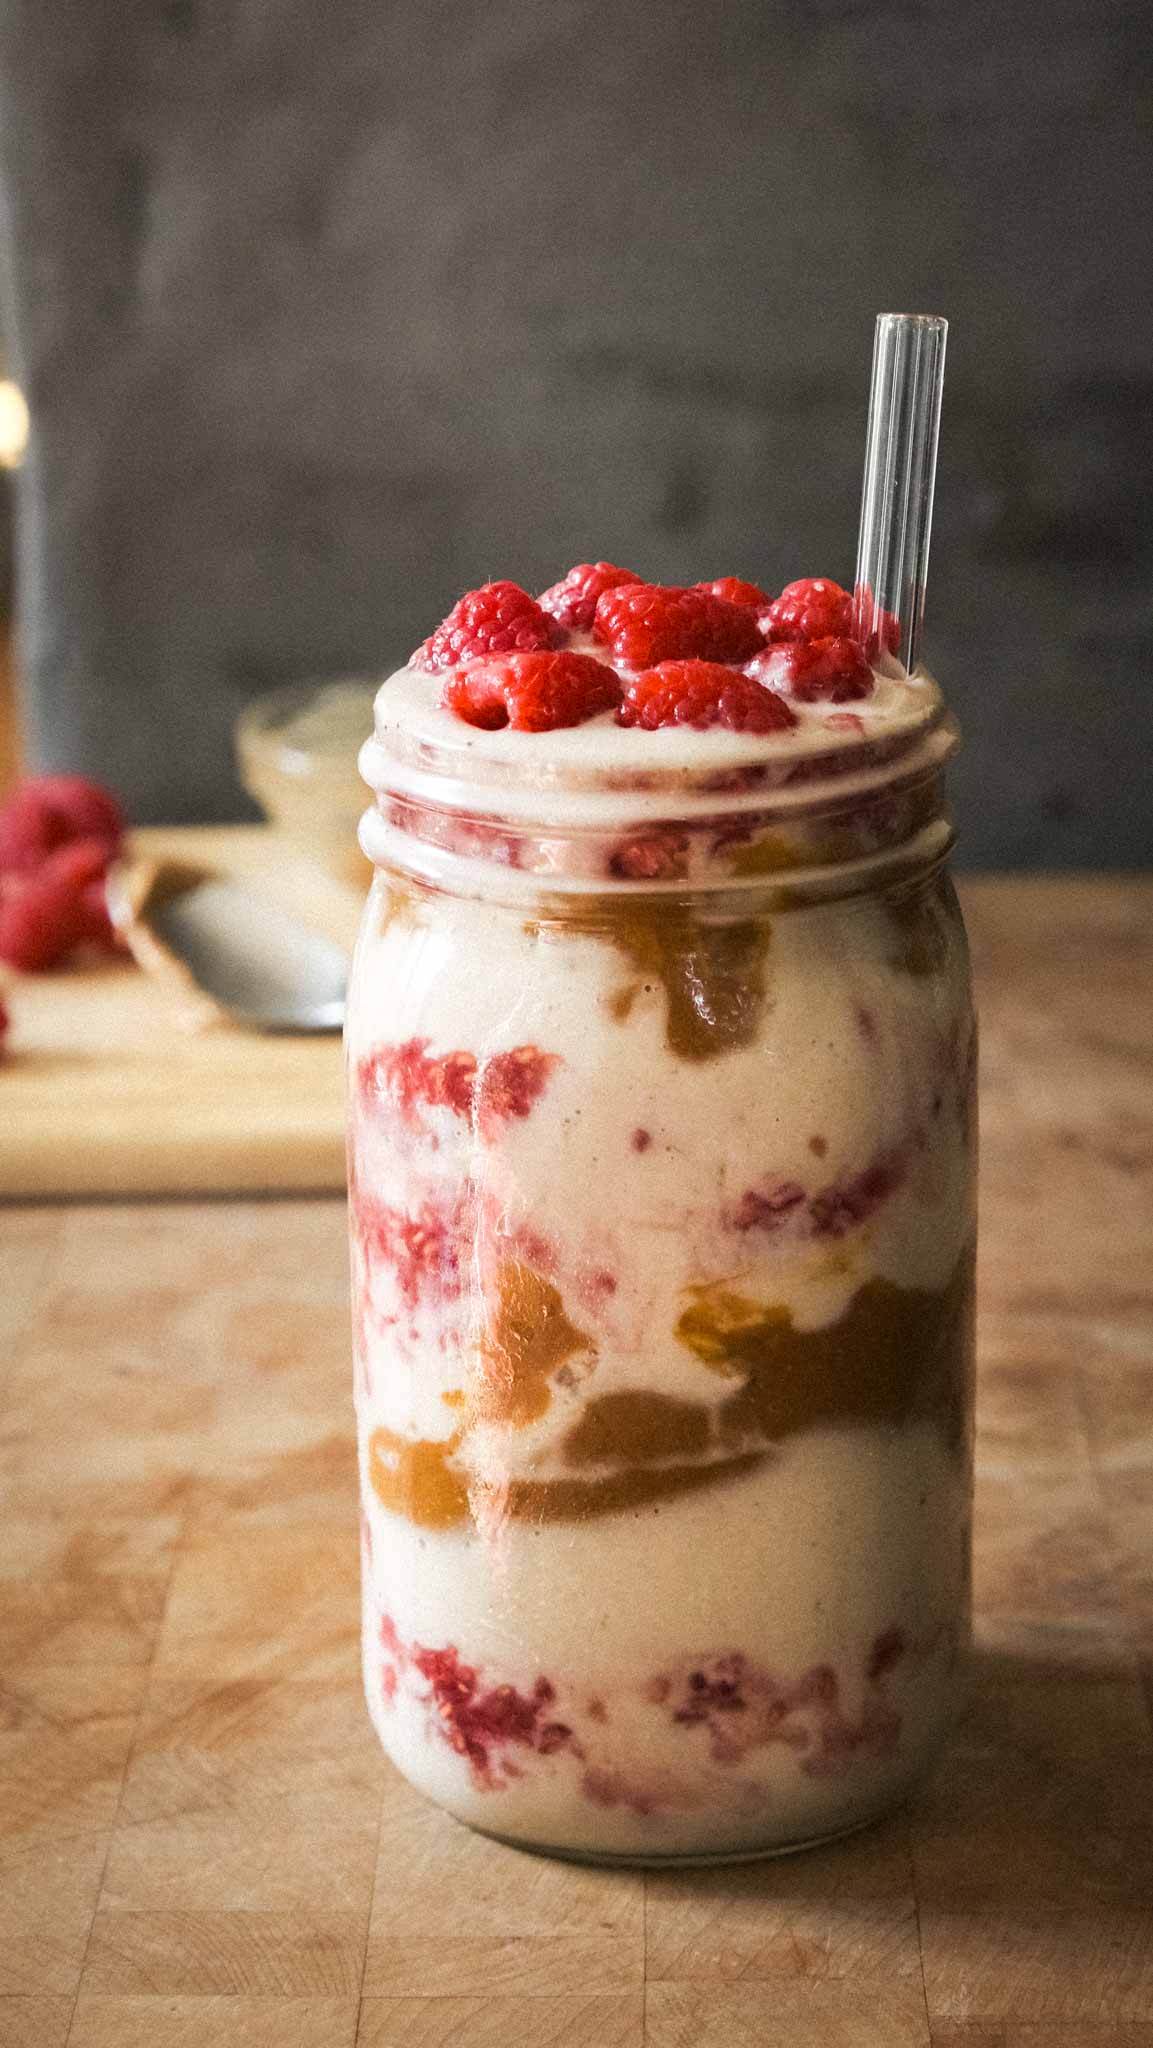
- Add a portion of the banana and cream milkshake to a large 32 ounce jar then stop 1/4 of the way up to swirl some of the peanut butter and raspberry in. Continue this all the way to the top. Garnish with more raspberries and any leftover peanut butter or raspberry mixture.
peanut butter and jelly smoothie calories: 670
Equipment: Vitamix High Speed Blender
Notes:
Dairy-Free Milk Alternatives: When making a dairy-free milkshake, you have various milk alternatives to choose from, such as almond milk, soy milk, coconut milk, oat milk, or cashew milk. Select the one that suits your taste preferences and dietary needs.
Sweeteners: Adjust the sweetness of your milkshake to your liking. You can use maple syrup, agave nectar, coconut sugar, or dates as natural sweeteners. Start with a smaller amount and add more as needed.
Frozen Ingredients: For a thicker and creamier consistency, freeze your dairy-free milk in ice cube trays before blending. This can eliminate the need for excess ice and prevent your milkshake from becoming too watery.
Flavor Variations: Get creative with flavors! Add vanilla extract, cocoa powder, or another fruit for a classic milkshake taste. Experiment with other flavorings like strawberries, blueberries, peanut butter, or cocoa nibs to create unique variations.
Thickening Agents: If you want an even thicker milkshake, consider adding ingredients like frozen banana slices, avocado, or silken tofu. These not only enhance the texture but also add extra nutrients.
Toppings: Have fun with toppings! Dairy-free whipped cream, shredded coconut, crushed nuts, chocolate chips, or fresh fruit can be delightful additions to your milkshake.
Allergen Considerations: Be mindful of allergies when making dairy-free milkshakes. Double-check the ingredients of your chosen milk alternative and any additional ingredients to ensure they are safe for your dietary requirements.
Ice: If you prefer a colder milkshake, you can add ice cubes to your blender. However, be cautious not to overdo it, as too much ice can dilute the flavor and thickness.
Blending Time: Blend the milkshake until all ingredients are fully combined and the texture is smooth. The blending time may vary depending on your blender’s power, so monitor it as you go.
Serving Glasses: Chill your serving glasses in the freezer for a few minutes before pouring in the milkshake to keep it colder for longer.
Enjoy Immediately: Dairy-free milkshakes are best enjoyed immediately after blending to retain their creamy texture. If you need to store any leftovers, keep them in an airtight container in the freezer, but expect some separation upon thawing.
Remember that making a dairy-free milkshake is all about personal preference, so feel free to adjust the ingredients and proportions to create the perfect milkshake tailored to your taste buds.
Thanks for stopping by for this Peanut Butter and Jelly Dairy-Free Milkshake recipe. If you like this check out these other recipes, Vegan Mexican Horchata, creamy vegan cinnamon milkshake or Mexican hot chocolate.
Peanut Butter and Jelly Dairy-free Milkshake
Equipment
- High Speed Blender
Ingredients
- 2 Frozen Bananas
- 1 1/2 cups cashew and coconut creamer-Nut Pod plant-based creamer or 3/4 cup soaked cashew and 2 cups of water
- 3 tablespoons creamy peanut butter
- 3 tablespoons maple syrup
- 1 cup raspberries
- Optional vanilla flavor
Instructions
- *If using cashews and water rather than an already made milk, soak the cashews for at least two hours prior.
- In one ramekin mix the peanut butter and 2 tablespoons of maple syrup and stir continuously until fully incorporated. In a separate bowl, add the raspberries and maple syrup and crush the raspberries until the resemble a consistency that is drinkable.
- Add the ingredients: frozen bananas, milk, flavoring if using, to a high speed blender and blend on highest setting for 50 seconds using tamper to move the bananas down into the blades.
- Add a portion of the banana and cream milkshake to a large 32 ounce jar then stop 1/4 of the way up to swirl some of the peanut butter and raspberry in. Continue this all the way to the top. Garnish with more raspberries and any leftover peanut butter or raspberry mixture.
tags: raspberry milkshake, peanut butter milkshake, nutty banana smoothie, best vegan milkshake,